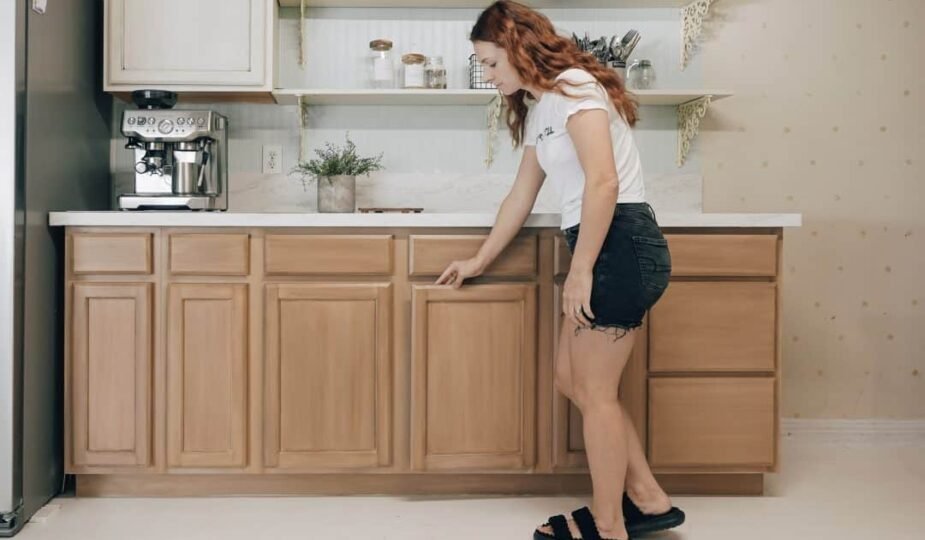
Building your own kitchen cabinets is a fantastic way to customize your kitchen while saving money. Not only does this project allow for creative control over the design, but it also gives you the flexibility to tailor your cabinets to your exact specifications. This guide provides an in-depth look at planning, building, and customizing DIY kitchen cabinets, complete with cost breakdowns and tips for avoiding common mistakes.
Planning and Preparation
Before getting started, thorough planning is essential to ensure your DIY project goes smoothly. Begin by deciding on the style and layout of your kitchen cabinets. Will you opt for a framed style, which offers a classic look and additional stability, or a frameless design, which provides a modern aesthetic with more accessible storage? This decision will impact the types of materials and construction methods you’ll need.
Essential Tools and Materials:
To build your DIY kitchen cabinets, you’ll need several tools and materials:
- Tools: Invest in a table saw, pocket-hole jig, clamps, drill, and level. These will be necessary for accurate cutting, joining, and installing.
- Materials: Plywood or MDF for the cabinet boxes, hardwood for the doors and trim screws, and wood glue.
In terms of safety, remember to wear goggles and gloves when cutting and assembling materials. Additionally, working in a well-ventilated area will help protect you from dust and fumes, especially when painting or staining.
Step-by-Step Guide to Building DIY Kitchen Cabinets
Creating kitchen cabinets involves several key steps, each requiring careful attention to detail to ensure a successful result.
Step 1: Cutting the Pieces
Accurate measurements are crucial. Begin by cutting the plywood sheets into panels for the sides, top, bottom, and back of each cabinet. If you’re adding shelves, cut these to the appropriate size as well. Using high-quality plywood will provide durability, which is particularly important for a project like this.
Step 2: Assembling the Cabinets
After cutting, it’s time to assemble. Use a pocket-hole jig to create strong joints between the cabinet panels. Start by joining the side panels with the top and bottom, then attach the back panel. Use wood glue for additional strength and clamps to hold everything in place until the glue sets. At this stage, you can add the shelves and any interior dividers, ensuring they’re level and evenly spaced.
Step 3: Installing the Cabinets
Install the cabinets by first locating the wall studs and marking them. Secure each cabinet to the wall with screws, ensuring they’re level and properly aligned. If you’re mounting multiple cabinets, attach them to each other as well for added stability. Installation is key to ensuring that your cabinets look seamless and professional.
Step 4: Finishing Touches
Sanding the cabinets will prepare them for painting or staining, which can give your kitchen a personalized look. Use a primer before applying paint to improve adhesion and durability. Finally, attach doors, hinges, knobs, and pulls. For a high-end touch, consider adding crown molding or trim to complete the look.
Customization Options
One of the greatest advantages of building your own cabinets is the ability to customize them to fit your style and needs. Here are some popular ways to personalize your cabinets:
- Decorative Elements: Glass inserts, cane webbing, or open shelving can add a unique touch. If you like a rustic style, consider incorporating reclaimed wood.
- Functional Additions: Pull-out shelves, lazy Susans, and built-in spice racks can greatly enhance your kitchen’s functionality. These features make it easier to access items and maximize storage.
- Finishing Touches: Whether you prefer a modern or farmhouse look, the finish can make a big difference. Paint colors, stains, and varnishes allow you to match the cabinets with your kitchen’s overall aesthetic.
By incorporating these customization options, you’ll not only improve the look of your cabinets but also increase their practicality.

Cost Breakdown and Budget Tips
DIY kitchen cabinets can save you money compared to buying pre-built options, but it’s important to budget wisely. Here’s a cost breakdown:
- Plywood/MDF: $50 to $100 per sheet
- Hardwood for Doors: $3 to $10 per square foot
- Hardware: $2 to $20 per piece
DIY kitchen cabinets typically cost between $1,000 and $3,000 for a full kitchen, depending on materials and customization. To save, consider repurposing materials or purchasing items on sale. For example, using plywood instead of hardwood can reduce costs without compromising durability.
Common Mistakes to Avoid
Avoid these common mistakes to ensure a successful DIY cabinet project:
- Inaccurate Measurements: Always double-check your measurements to prevent alignment issues.
- Using Low-Quality Materials: Opt for durable options like plywood for the cabinet structure. Avoid particle board as it’s prone to damage.
- Skipping Surface Prep: Failing to sand or prime can result in a poor finish. Take the time to prep surfaces for the best results.
Taking these precautions can save you time, money, and frustration.
Conclusion
Building DIY kitchen cabinets is a fulfilling project that offers the chance to customize your kitchen while saving on costs. With proper planning, quality materials, and a bit of creativity, you can transform your kitchen into a functional, beautiful space. Start your project today and enjoy the satisfaction of a personalized kitchen.


